Air fryer bread is a wonderful discovery for anyone who loves the smell of fresh loaves but does not want to deal with the heat of a big oven. This recipe is all about bringing the traditional art of baking into the modern age by using a small kitchen appliance that most of us already own and love. Imagine having a warm and crusty piece of bread ready in a fraction of the time it usually takes to preheat a large stove. You do not need to be a professional baker or have expensive tools to make this happen in your own kitchen today. The air fryer works by circulating hot air very quickly around the dough which creates a beautiful golden crust while keeping the inside soft and airy. It is a simple way to enjoy homemade food without the stress of complicated techniques or long waiting periods that usually come with bread making. You will find that this method is very forgiving and perfect for beginners who are just starting their journey into the world of yeast and flour.
People absolutely love this recipe because it offers instant satisfaction and a sense of pride that only comes from baking your own food from scratch. There is something truly special about taking basic ingredients like flour and water and watching them transform into a beautiful loaf of bread. Many people enjoy the fact that the air fryer does not heat up the whole house like a standard oven does which makes it a great choice for warm summer days. It is also a very budget friendly way to eat because you can make many loaves of bread for the price of one fancy loaf from a bakery. The texture of air fryer bread is unique because the rapid air movement creates a very specific type of crunch on the outside that is hard to get elsewhere. Families love it because kids can help with the mixing and everyone gets to enjoy a warm slice with butter as soon as it is finished. It is a comforting snack that brings people together and makes any meal feel a little bit more special and homey.
You should make this bread whenever you feel the need for a little bit of comfort or when you want to impress your friends at a dinner party. It is perfect for those lazy Sunday mornings when you want a fresh piece of toast but do not want to leave the house to visit the store. Many people choose to make this recipe for emotional reasons because the process of kneading dough can be very relaxing and helps to lower stress after a busy work week. If you are focused on fitness or health then making your own bread is a great choice because you have total control over what goes into your body. You can skip the preservatives and hidden sugars that are often found in bread you buy from the supermarket shelf. This bread tastes so much better than anything wrapped in plastic because it is fresh and full of life and love. Whether you are feeling happy and want to celebrate or feeling a bit down and need a warm hug in the form of food this bread is the answer.
The taste of this air fryer bread is deep and rich with a lovely balance between the salty crust and the slightly sweet middle. When you pull the basket out of the air fryer and see that perfect brown top you will feel a huge sense of achievement every single time. It is the kind of recipe that becomes a staple in your home because it is reliable and always delivers a delicious result without fail. You can serve it alongside a bowl of hot soup or use it to make the best grilled cheese sandwich you have ever tasted in your life. The air fryer handles the heat so well that the bread cooks evenly and you never have to worry about a soggy bottom or a burnt top if you follow the steps. This recipe is a celebration of simple living and the joy of creating something beautiful with your own two hands. It encourages us to slow down and enjoy the small things like the sound of a crust cracking or the way butter melts into a warm piece of dough.
Ingredients You Will Need
To make this delicious air fryer bread you will need to gather these simple ingredients from your pantry or local store.
-
2 cups of all purpose flour or bread flour
-
1 teaspoon of rapid rise instant yeast
-
1 teaspoon of white sugar to help the yeast grow
-
Half a teaspoon of fine sea salt
-
Three quarters of a cup of warm water (not hot)
-
1 tablespoon of olive oil or melted butter
-
Extra flour for dusting your work surface
Step by Step Method
-
Start by taking a large mixing bowl and adding your warm water along with the sugar and the instant yeast. Stir it gently and let it sit for about five minutes until you see little bubbles forming on the surface of the water.
-
Once the yeast is bubbly and active you can pour in the olive oil or melted butter and give it another quick stir to combine the liquids.
-
Add the flour and the sea salt into the bowl with the wet ingredients. Use a wooden spoon or your clean hands to mix everything together until a shaggy dough starts to form in the bowl.
-
Clear a space on your kitchen counter and sprinkle a little bit of extra flour on the surface so the dough does not stick to the table.
-
Tip the dough out onto the counter and begin to knead it. You do this by pushing the dough away from you with the palms of your hands and then folding it back over itself.
-
Keep kneading the dough for about five to eight minutes until it becomes very smooth and stretchy. If the dough feels too sticky you can add a tiny bit more flour one spoonful at a time.
-
Shape the dough into a neat round ball and place it back into a greased bowl. Cover the bowl with a clean kitchen towel and put it in a warm spot in your house.
-
Let the dough rise for about one hour or until it has grown to double its original size. This step is very important because it makes the bread light and fluffy inside.
-
After the dough has risen gently punch it down to release the air and shape it into a round loaf that will fit comfortably inside your air fryer basket.
-
Line the bottom of your air fryer basket with a piece of parchment paper to prevent sticking. Place your shaped dough inside the basket.
-
Let the dough rest inside the air fryer for another twenty minutes to puff up again while you prepare to cook it.
-
Close the air fryer and set the temperature to 320 degrees Fahrenheit. Cook the bread for about 20 to 25 minutes depending on the power of your machine.
-
Around the 15 minute mark you should check the bread. If it is getting too dark on top you can cover it loosely with a small piece of foil.
-
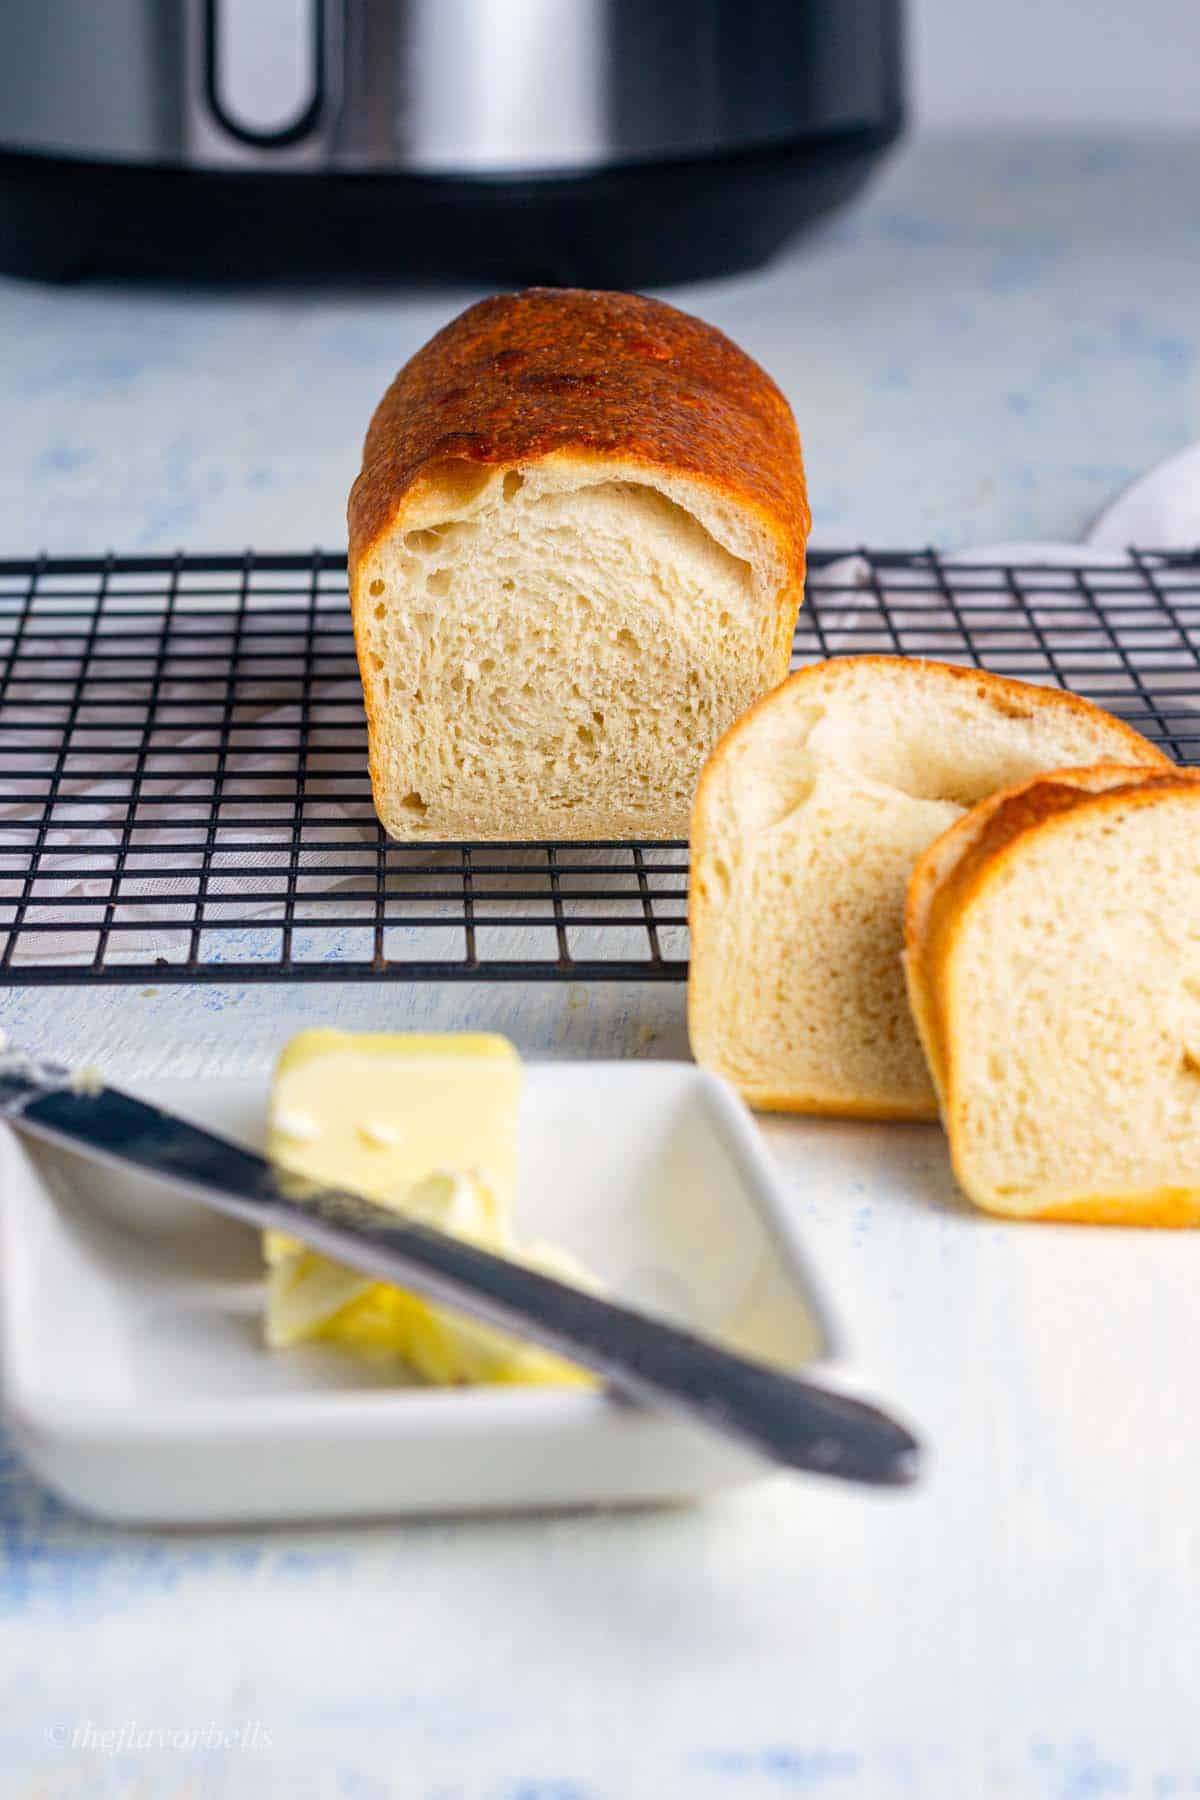
When the timer goes off the bread should sound hollow when you tap the bottom of the loaf. Remove it carefully and let it cool on a wire rack before slicing.
Why This Recipe Is Special
This recipe is special because it brings the joy of baking to people who might feel intimidated by a traditional oven. It is a very healthy choice because you are avoiding the chemicals and additives found in factory made bread products. Using an air fryer is also energy efficient which is better for the planet and your electricity bill at the end of the month. The texture is truly unique because the air fryer creates a thick crust that protects the soft and tender crumb on the inside of the loaf. This bread is high in energy and provides the perfect base for healthy toppings like avocado or lean proteins. It is a recipe that grows with you because once you master the basic loaf you can start adding your own flair and style to it. The taste is honest and simple which reminds us that we do not need complicated flavors to be satisfied. Every bite tells a story of patience and care which is why homemade bread always feels so much better than anything else.
Extra Tips for Better Taste
To make your air fryer bread taste even more amazing you can try adding different herbs like dried rosemary or oregano into the dough during the mixing stage. If you love a savory flavor you can press a few cloves of minced garlic into the top of the loaf before you start the cooking process. For a beautiful shiny finish you can brush the top of the dough with a little bit of egg wash or milk just before it goes into the air fryer. Another great trick is to spray a little bit of water into the air fryer basket right before you close it because the steam helps to create an even crunchier crust. If you prefer a whole grain flavor you can swap out half a cup of white flour for whole wheat flour but you might need a tiny bit more water. You can also sprinkle coarse sea salt or sesame seeds on the top to give it a professional bakery look. These small changes allow you to customize the bread to suit your own personal taste buds and make every loaf a new adventure.
Final Thoughts
Baking your own air fryer bread is an experience that everyone should try at least once because it is so rewarding. It turns your kitchen into a cozy sanctuary and fills your home with the most wonderful aroma in the world. We hope that this guide makes you feel confident enough to start your baking journey today with simple ingredients and a big smile. Remember that baking is a skill that gets better every time you do it so do not worry if your first loaf is not perfect. Just keep practicing and soon you will be the bread expert in your family. Enjoy every warm and buttery slice of your homemade creation because you worked hard for it and you deserve the best.
Nutrition Details
This table shows the approximate nutrition values for one slice of air fryer bread assuming the loaf is cut into eight equal pieces.
Disclaimer
Please remember that the nutritional information provided here is only an estimate and can change based on the specific ingredients you buy at the store. Everyone has a different body and different health goals so what works for one person might be different for another. If you have any allergies to gluten or yeast please do not consume this bread and consult with a medical professional for alternatives. Results in baking can also vary depending on the brand of air fryer you use and the humidity in your kitchen on that day. Always practice safety when using kitchen appliances and make sure your air fryer is clean before you start cooking. This article is for informational purposes only and is not meant to replace the advice of a trained doctor or nutritionist.