Making your own frozen treats at home might sound like a very hard job that requires special machines or a lot of complicated steps but that is actually not true at all. This specific recipe for four ingredient ice cream is designed to show you that anyone can be a master in the kitchen without spending hours of time or a lot of money on expensive tools. We are focusing on a very simple base that uses only four main items which you probably already have in your pantry or can find at any local grocery store nearby. The beauty of this recipe lies in its simplicity because it removes all the stress of cooking custard on a stove or worrying about eggs curdling or making a mess with heavy equipment. By the time you finish reading this guide you will understand exactly how to create a smooth and creamy dessert that tastes just as good as the premium brands you find in the fancy shops. It is a wonderful feeling to know exactly what goes into your food and this recipe gives you total control over the quality of every single bite you take.
People absolutely love this version of ice cream because it feels like a magic trick where simple liquids turn into a solid and velvety dream right before your eyes. In a world where everything seems to be getting more complex and full of artificial additives this recipe stands out as a breath of fresh air because it is honest and pure. Most store bought versions are filled with strange gums and stabilizers or chemicals that are hard to pronounce but here you are using real ingredients that your body recognizes and enjoys. The texture is another huge reason why people fall in love with this method because it achieves a perfect level of silkiness that many people think is impossible to do at home without a churner. There is a certain kind of pride that comes from serving a bowl of homemade dessert to your friends or family and watching their faces light up when they realize you made it yourself. It creates a sense of connection and joy that you just cannot get from opening a plastic carton that was sitting in a big supermarket freezer for several months.
You should make this recipe whenever you feel like you need a little bit of comfort or a sweet escape from a long and busy day at work or school. It is perfect for those hot summer afternoons when the sun is beating down and you want something cold and refreshing to help you cool off while sitting on your porch. Beyond just the taste many people choose this recipe for fitness reasons because you can easily swap out the sugar or use lighter versions of the base to fit your specific diet needs. It is also an amazing activity to do with children because it is safe and easy and teaches them about how different textures change when they get cold in the freezer. If you are feeling emotional or just want to celebrate a small win in your life there is nothing quite like a bowl of creamy vanilla or chocolate treats to make the moment feel extra special. Whether you are hosting a big birthday party or just having a quiet night in watching movies this simple dessert is the perfect companion that never fails to bring a smile to everyone around the table.
The reason why this recipe works so well is because it relies on the natural fats and sugars to create a structure that stays soft even when it is completely frozen solid. You do not have to be a professional chef or have any prior experience in baking to get this right on your very first try which makes it very beginner friendly. It is an excellent way to save money too because buying the individual ingredients in bulk is much cheaper than purchasing small pints of luxury ice cream every single week. This recipe is also very versatile which means you can start with the basic four ingredients and then slowly add your own favorite flavors or crunchy bits as you get more confident. It represents a return to simple living where we take a few moments to prepare something with our own hands instead of always relying on fast food or prepackaged snacks. Once you taste the difference between this fresh homemade version and the processed stuff from the store you will likely never want to go back to the old way of doing things ever again.
Ingredients You Will Need
To make this delicious and creamy dessert you will need to gather these four simple items from your kitchen or the store.
-
Two cups of heavy whipping cream which must be very cold
-
One can of sweetened condensed milk which is about fourteen ounces
-
Two teaspoons of pure vanilla extract for a rich and deep flavor
-
Half a cup of cocoa powder if you want chocolate or extra fruit puree for a fruit version
Step by Step Method
The first thing you need to do is find a large glass or metal bowl and put it in the freezer for about ten minutes because having a cold bowl helps the cream whip much faster and better. Once the bowl is nice and chilled you should pour the two cups of heavy whipping cream into it and use a hand mixer or a stand mixer to start beating it on a medium speed. You want to keep mixing until the cream starts to get thick and forms what we call stiff peaks which means when you lift the mixer up the cream stays standing up on its own.
While the cream is looking fluffy and beautiful you should take your can of sweetened condensed milk and pour it into a separate medium sized bowl. Add your two teaspoons of vanilla extract into the condensed milk and stir it gently with a spoon until the vanilla is fully mixed in and smells amazing. If you decided to use cocoa powder or fruit puree this is the exact time to stir those into the condensed milk as well so the color is even and there are no big clumps left.
Now comes the most important part which is called folding where you take a big scoop of the whipped cream and put it into the condensed milk mixture. Use a rubber spatula to gently turn the mixture over itself instead of stirring fast because you want to keep all that lovely air inside the cream so the ice cream stays light. Continue adding the rest of the whipped cream in small batches and folding it in very slowly until the whole mixture looks smooth and has one single color throughout.
Once everything is combined you should pour the liquid mixture into a deep container like a loaf pan or a plastic tupperware box that has a tight lid. Smooth out the top with your spatula so it looks flat and pretty then put the lid on or cover it tightly with some plastic wrap to keep the air out. Place the container in the coldest part of your freezer and leave it there for at least six hours or even better leave it overnight so it becomes perfectly firm. When you are ready to eat just take it out and let it sit on the counter for two or three minutes so it is easy to scoop into bowls or onto cones.
Why This Recipe Is Special
This recipe is special because it does not use any eggs which means you do not have to worry about cooking anything or dealing with raw egg safety issues. It is also a huge time saver because the actual work part only takes about ten minutes of your time while the freezer does all the hard work for you. Since you are making it at home you can ensure that the ingredients are high quality and free from any weird preservatives or fake colors that are often found in cheap ice cream. The taste is incredibly rich and dense which feels very luxurious on the tongue and gives you a sense of satisfaction that lighter airy ice creams cannot provide. It is a great way to handle cravings without having to leave your house or spend a lot of money on delivery fees.
Extra Tips for Better Taste
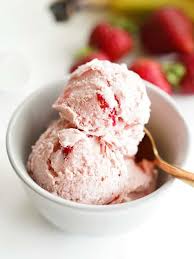
If you want to make your ice cream even better you can try adding some texture like crushed chocolate cookies or small pieces of salty pretzels after you finish folding the mixture. Some people love to swirl in a little bit of caramel sauce or peanut butter right before putting it in the freezer to create beautiful ribbons of extra flavor. You can also toast some chopped nuts like almonds or walnuts and sprinkle them on top for a nice crunch that goes perfectly with the soft cream. Another great tip is to use a tiny pinch of sea salt in the mix because salt actually helps to bring out the sweetness of the sugar and makes the vanilla taste much stronger. If you like fruit you can mash up some fresh strawberries or raspberries and swirl them in for a bright and tart contrast to the sweet milk.
Final Thoughts
Making ice cream at home is a joyful experience that reminds us how simple ingredients can create something truly magical when we put in a little bit of love. This four ingredient method is the perfect starting point for any new cook because it is almost impossible to mess up and the results are always delicious. You can share this with your friends or keep a container in the freezer for those moments when you just need a sweet treat to brighten your day. We hope you enjoy every creamy scoop and feel proud of what you have created in your very own kitchen.
Nutrition Details
Below is a table that shows the estimated nutrition for one serving of this homemade ice cream based on a standard scoop size.
| Nutrient Type | Amount Per Serving |
| Calories | 280 calories |
| Total Fat | 18 grams |
| Saturated Fat | 11 grams |
| Cholesterol | 55 milligrams |
| Sodium | 60 milligrams |
| Total Carbohydrates | 26 grams |
| Dietary Fiber | 0 grams |
| Sugars | 25 grams |
| Protein | 4 grams |
| Vitamin D | 2 percent |
| Calcium | 12 percent |
| Iron | 0 percent |
| Potassium | 4 percent |
Disclaimer
Please remember that everyone has a different body and different health needs so the way this food affects you might be different from someone else. This recipe is high in sugar and fats which means it should be enjoyed as a special treat rather than a main meal. If you have any allergies to dairy or specific health conditions you should talk to a doctor before trying new recipes. The nutrition facts are just estimates and might change depending on the specific brands of ingredients you choose to buy at the store. Always listen to your own body and enjoy your food in a way that feels healthy and good for your unique situation.